Fairely Well Maid

Visit my store on Storenvy

Follow Me on Twitter

Saturday, July 30, 2011

Project List - Basket liner

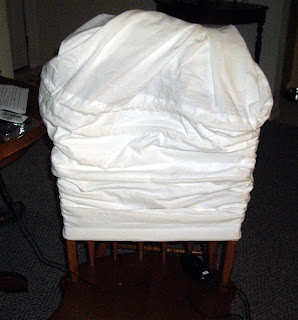
This is the basket liner I'm replacing.  It's a perfectly good liner, but it's not what you would call "Period Correct" for either the SCA or a Renaissance Faire.  I'm using bits of muslin left over from another project.  I cut the pieces using this liner as a pattern, with the addition of a pocket on the front piece (I love pockets).  Got everything stitched up and...it didn't fit.  Grrrrr.

Really easy fix for it, all I have to do is slit the back side seam and put a gusset in there.  I just don't understand where I went wrong.  Oh well.  I stitched a thin yellow ribbon on the sides and the back so that it will tie around the handles on the sides and the hinges on the back.  I'll decorate it with the tags I've collected from various SCA and Renaissance events.

So, project list now looks like this:

1.   Finish two pair of pants for Scott.
2.   Perfect the pattern for an Elizabethan Corset.  Yes I know I've been talking about this one for a very long time but, it's time has come.
3.   Make Elizabethan Corset for Jenn..
4.   Make Purple 16th century gown with a non-boned bodice as the corset mentioned above is worn underneath it.  This will have set in sleeves that bell out and are lined in orange (silk if there is enough) and turned back.  It will also have a split skirt attached.
5.   Make Spiced Orange silk stomacher to go with above bodice.
6.   Make Spiced Orange gored underskirt. (Are you noticing the pattern yet)
7.   Make another pair of plain bloomers.
8.   Make a pair of pj pants.

The bloomers are next.  Then comes the Elizabethan Corset.  This is a project that I've been putting off for a while now.  Yes, Jenn, I know.

Friday, July 29, 2011

Project List - Corded Petticoat - Finished

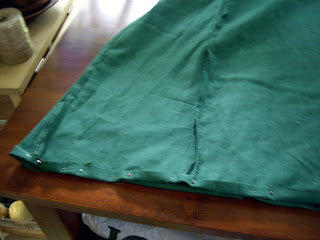
It's done.  I sewed in the channels then sewed up the side seam.  Then came one of the things I don't like doing, I had to fish stuff.  I fished 8 lengths of sisel rope through the channels and two inch wide elastic through the waistband.  I wrapped the end of the rope in duct tape so it wouldn't unravel.

I'm straightening the rope in the hem over the backs of two chairs.

This is the rope I used.
OK, here is the new list.

1.   Finish two pair of pants for Scott.
2.   Perfect the pattern for an Elizabethan Corset.  Yes I know I've been talking about this one for a very long time but, it's time has come.
3.   Make Elizabethan Corset for Jenn..
4.   Make Purple 16th century gown with a non-boned as the corset mentioned above is worn underneath it.
5.   Make Spiced Orange silk stomacher to go with above bodice.
6.   Make Spiced Orange gored underskirt. (Are you noticing the pattern yet)
7.   Make Spiced Orange sleeves, if I have enough material left from skirt.
8.   Make another pair of plain bloomers.
9.   Make a pair of pj pants
10. Make a new liner for my work basket.

I'm probably going to make the liner for my work basket next.

Thursday, July 28, 2011

Project List - Corded Petticoat

I have some soft, soft, soft cotton/linen blend that I had washed and shrunk in my fabric stash.  It was just enough for a petticoat with a bit left over.  I'm making this for two reasons.  The first is for those skirts/gowns that I don't want a lot of poof but I would like a bit of shape.  The second is to go over the crinoline for added poof.  So I had to make it large enough to go over the crinoline.  So I put the crinoline on and loosely draped the fabric around and cut. 

Back at the sewing machine I put a 2.5 inch waist band on it and an inch and a half hem.  A piece of rope will go through the hem.  Then, well, I cheated.  I took another length of the fabric and sewed it to the bottom half of the petticoat.  I did this in two pieces do there would be an opening so I could fish the rope through the channels.  I then marked of the rope channels, 1.5 inches for the channel and two inches between.  The rope I'm using is a heavy hemp rope used as a laundry line.

I'll sew up the channels and the seam tomorrow.  Then I'll fish the rope through.

This is the panel of fabric I'm using to sew channels instead of using something like bias tape.
Here is the opening.
The channel markings.  I find that the marking pens and pencils fade way too fast.
Pictures of the finished product tomorrow

Wednesday, July 27, 2011

Project list - Crinoline

While I was waiting for Scott to come for his final fitting on his pants, I decided to tackle my crinoline.  I decided to use a white cotton petticoat that I had tried to turn into a hope skirt but it just wasn't working.  In retrospect I should have cut open a seam and taken the elastic out of the waistband before beginning to put the netting on.  Ah well, lesson for the future.

I had 10 yards of very wide netting so I did 3 layers of double thickness.  First I hemmed the skirt up so that it was ankle length instead of floor length.  Then I started with the first layer.  I had to put a running stitch through the netting because I don't have a ruffle foot for my machine (yet).

This is me hand ruffling 10 yards of netting.
So, once the ruffling was done I sewed on the first layer.  This was the bottom layer that matched up to the bottom hem of the skirt.

Bottom layer.
The next layer went about three quarters of the way up.  At this point it looked like the petticoat that ate the sewing table.


Lastly came the last layer.  This one went from below the waistband to the hem.  This was actually the worst layer to put on.  Here is why I say I should have pulled the hem and the elastic before starting.  It's not the prettiest crinoline I've ever seen, but it will make my skirts more poofy, especially with a corded petticoat on top.

Looks like a weird ballet skirt.  But no one will see it and my skirts will have more shape.
So, there you go, my crinoline.

My project list now looks like this.

1.   Finish two pair of pants for Scott.
2.   Perfect the pattern for an Elizabethan Corset.  Yes I know I've been talking about this one for a very long time but, it's time has come.
3.   Make Elizabethan Corset for Jenn.
4.   Make corded petticoats.
5.   Make Purple 16th century gown with a non-boned as the corset mentioned above is worn underneath it.
6.   Make Spiced Orange silk stomacher to go with above bodice.
7.   Make Spiced Orange gored underskirt. (Are you noticing the pattern yet)
8.   Make Spiced Orange sleeves, if I have enough material left from skirt.
9.   Make another pair of plain bloomers.
10. Make a pair of pj pants
11. Make a new liner for my work basket.


I'm going to wash and shrink the material for the corded petticoat tomorrow.  I know I'm not doing them in order, but I'm picking the quick projects to do while waiting for the final fitting.

Stay tuned.

Saturday, July 23, 2011

Nalebinding

Well, I finished it by putting earflaps on it.  It's cute and will fit a small child.


Nalebinding

I finally learned how to do this.  Thank you to the ever beautiful Miss Evy for showing me.  I've made a hat for a small baby out of a beautiful warm wool.  I really like this technique.  Must learn more.

I need to spiff it up a bit, but this is the basic hat.

Project list update.

I have a pair of pants cut and partially sewn.  Need Scott to come over and try them on for a fitting.  Have the fabric for the other pair washed and shrunk in the dryer.  I bought the heavy linen, enough for 2 Elizabethan corsets and I picked up the last of the netting for the crinoline.

I'm starting to draw out the plan for the Henry the VII Noble garb.  I also have the fabric and the boning for all the underpinnings.  I've been researching the cut and look, plus been looking at the hats.  I'll be attempting to cover a small top hat to match.  From my research it actually looks like the bodice and the split skirt are one piece.  The skirt is either gored or gathered at the waist to give it the fullness it needs to go over the farthingale (or in my case a crinoline) and a bum roll (not certain about making one of these). 

So the new list looks like this:

1.   Finish two pair of pants for Scott.
2.   Perfect the pattern for an Elizabethan Corset.  Yes I know I've been talking about this one for a very long time but, it's time has come.
3.   Make Elizabethan Corset for Jenn.
4.   Make crinolan and corded petticoats.
5.   Make Purple 16th century gown with a non-boned as the corset mentioned above is worn underneath it.
6.   Make Spiced Orange silk stomacher to go with above bodice.
7.   Make Spiced Orange gored underskirt. (Are you noticing the pattern yet)
8.   Make Spiced Orange sleeves, if I have enough material left from skirt.
9.   Make another pair of plain bloomers.
10. Make a pair of pj pants
11. Make a new liner for my work basket.

I know, the list is supposed to get smaller, not longer.  Ah well.

Friday, July 15, 2011

Project list.

Oy Vey, I have got to get organized or I'm just not going to get what I want done.  So, here I am writing down what I want to get done and in the order I have to do them no less.  The frantic need to get stuff done by some horrid deadline is now over (Thank you).

1.  Finish two pair of pants for Scott. 
2.  Perfect the pattern for an Elizabethan Corset.  Yes I know I've been talking about this one for a very long time but, it's time has come.
3.  Make Elizabethan Corset for Jenn.
4.  Make crinolan and corded petticoats.
5.  Make Purple 16th century bodice, not boned as the corset mentioned above is worn underneath it.
6.  Make Spiced Orange silk stomacher to go with above bodice.
7.  Make Spiced Orange gored underskirt. (Are you noticing the pattern yet)
8.  Make Purple gored split skirt.
9.  Make Spiced Orange sleeves, if I have enough material left from skirt.

If you didn't notice the pattern, I'm going for a Noble garb that you may have seen in Henry the Seventh's court.  I have a mini-tricorn hat in a beautiful antique gold that I may wear with it or I may make a cover for my Elizabethan tall hat.  Haven't decided on that yet.

Ideally, this will all be done for CTRF in the fall.  We are aiming for an October visit so, I don't see that this isn't possible.  Especially with my new "MOAR POWER" machines.

Wednesday, July 6, 2011

The Kate Holly Clark Chemise

Better known as the 20 Minute chemise, although she is the only one I know who can make it in 20 minutes.

I wanted one that I could close the sleeves with a draw string and one that would be off the shoulder.  It is about mid calf length but I have plenty of the material left to put a deep ruffle on it if I want it floor length.  OK, here we go.

Take your length of fabric and wrap it around your bust 1 and 1/2 times.  If you want floor length make sure the width is long enough to reach the floor from your shoulders.  This is your body piece.  For your arm you need two pieces that are long enough to reach from your neckline to your wrist, plus hem allowance, and wide enough to go around your arm comfortably.  Clear (yeah, I know, as mud).

Now take your body piece and fold it in 1/2 lengthwise, then in half again.  From the corner measure out 6 inches across the top and then down the length (or if you are generously proportioned like I am, 8 inches).  Cut that corner off.  Then, with the fold of the sleeve at the top, match up the sleeve bottom and cut a matching line.

The body is on the bottom and the sleeve is on the top right.
Unfold the body and you should have two sides with the corners cut off and one with an open side.  First thing you want to do is attach the sleeves.  Pin one side of the cut to the front of the body and the other side of the cut to the back, keeping the fold of the sleeve on top.  Do this to the other side and sew the sleeves on.
Sleeve pinned on.


Sleeve sewn on.
Once you have both the sleeves on you want to sew up the one side seam and the sleeve seam.


Sew side seam up to sleeve.
Turn the piece and sew up the sleeve.
Sew up the second sleeve, the one without the side seam.  Sew the sleeve seam then turn and sew a little corner so you don't have a hole in your underarm.
Sleeve without the side seam.
OK, here comes the hardest part.  The neckline needs to be rolled and the top of the sleeves become part of the neckline.  This part is hard to explain.  It took me a few tries and I still get weird gathers by the sleeve seams.  My friend Kate can not only do this without weirdness, but she can actually do it with the elastic in it.  I know, don't hate, she has been doing this for a while.  I want to be her when I grow up.

Just trust me.  Even with weird gathers, because it is either elastic neck or drawstring it comes out looking good.  Just remember to leave an opening for which ever you choose to be fed through.

Pinning the neckline.
Hem the sleeves, if you are adding a drawstring or elastic remember to leave the opening to thread it through.  Hem the bottom and you're done.  You can wear this on or off the shoulder.  You can do several different treatments with the sleeves.  It works well and is very simple to put together once you have done it a few times.  Just to show you that it does work, here are the bad mirror pictures.

Don't mind the bra strap.  See it looks right.

You can't even see the weird gathers.

I wanted drawstring arms.
OK...there you go.  Give it a try and you'll see it works.

Tuesday, July 5, 2011

11th Century Bliaunt - Green FINISHED

I got my new to me Necchi 575FA machine this afternoon.  It's so amazing.  This baby works like a charm.   I was able to finish the trim on my Bliaunt and make a Kate Holly Clark special chemise.  One of these days I will post the directions for this, but it takes drawing and I'm really bad at that.

Here is my new machine.
Isn't it great.

The model number.
 Here is the finished Bliaunt.  I'll get pictures of me in it when I can.


Well, that's it.  I love this pattern so there may be more variants in the future.  Thanks for sticking with me on this one.  It was longer than it should, but I got two great machines out of it and learned that unless you are just a beginner or don't sew that much, stay away from plastic throw away machines.

Sunday, July 3, 2011

11th Century Bliaunt - Green - Back in business

Thanks to a very wonderful friend (Kate) who seems to collect used sewing machines I'm back in business.  She had an older Necchi that was sitting around doing nothing, so she gave it to me as a spare machine.  Once I got it cleaned up and de-linted (wow, there was a lot of lint), I started playing.  Yes, I spent $10.00 for a download of the users manual.  I figured out what the problem was with the tension.  Got everything adjusted and, bam, can this machine chew through a hem.  I'm going to have to get more bobbins, because my old singer bobbins won't fit.  Not a problem.

It's it pretty.
I got the gussets sewn in and I got the sleeves and bottom hemmed up.  All I have left is the trim and this one is in the bag.


Thank you my dear Kate for getting me back in business.

Saturday, July 2, 2011

A Requiem to my sewing machine

My poor Singer Simple sewing machine is gone.  A moment of silence please.

It has been acting up badly for the last few projects.  Odd jams, a squeak that would drive me almost to drink, needles that wouldn't stay in and bobbin issues that were making me have to stop just about every few inches and reload it or fuss with the tension.  I brought it to a wonderful older gentleman who repairs and sells machines.

He was very honest with me.  He said that these Singer machines are all plastic gears and almost impossible to take apart to get them fixed.  He said he would take a look at it and if it was going to be more than $60.00 to fix it, he would call me.  He then recommended a Necchi he had used for $125.00, after carefully questioning me about what I make and how often I work with my machine.  He said that since the Necchi were metal gears it was a real workhorse and would suit my needs.

No, I didn't take his word for it, I came home and did some research.  He was right.  This would be a perfect machine for me.  Got the call from him that my Singer can't be fixed as several of the parts needing to be replaced cannot be because Singer doesn't make them anymore.

OK, so as soon as I can (got some kind of 24 hour stomach thing) I'm going over there to get my new to me Necchi machine.  He said he would put my name on it.  I'm excited about this, as I have to still finish my green bliaunt and at least one chemise.

So, good bye old friend.  You serviced me well and I had a lot of fun learning to sew on you. 

Friday, July 1, 2011

Beaded Snood - Finished

All finished.  I just strung 545 beads to make a large.  Yes, I'm nuts.